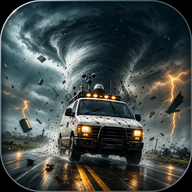
Funnel Runners Beginner Guide: Essential Tips to Survive the Storm and Escape the EF5
Master the chaos of storm chasing with our Funnel Runners beginner guide. Learn to repair the van, manage moodlets, and survive devastating EF5 tornadoes.
Surviving a catastrophic disaster requires more than just luck; it requires a strategic plan and a steady hand. If you are stepping into the wind for the first time, this Funnel Runners beginner guide will provide the foundation you need to survive. In this high-stakes co-op experience, following a Funnel Runners beginner guide is often the only difference between escaping in a repaired van and being swept away by a devastating EF5 tornado.
Funnel Runners is an intense survival game that thrusts up to seven players into a doom-ridden suburban landscape. You have approximately 20 minutes to scavenge for parts, repair your getaway vehicle, and flee before the environment is completely obliterated. While the game offers a solo mode, the chaotic synergy of multiplayer is where the experience truly shines. This guide will walk you through the core mechanics, from the complex weather systems to the intricate repair mini-games.
Understanding the Tornado and Destruction Systems
The central antagonist of every match is the tornado. Unlike many games that attempt to simulate complex wind physics—which often results in poor performance—Funnel Runners uses an intelligent data manipulation system. This creates a convincing illusion of reality while allowing the game to destroy hundreds of objects simultaneously without crashing your frame rate.
When a storm spawns, the game "rolls" for its intensity, ranging from a relatively minor F1 to a catastrophic F5. Each object in the world, from a simple wooden fence to a brick chimney, has a specific resistance threshold. If the wind speed exceeds that threshold, the object begins its destruction sequence: dust effects appear, debris particles spawn, and the asset is eventually swapped for a "broken" version or removed entirely.
Tornado Intensity and Impact
The Van: Your Mobile Command Center
The van is the most important asset in the game. It serves as your spawn point, your tool storage, and your only means of escape. However, at the start of most matches, the van is essentially a paperweight. Players must work together to diagnose and fix a variety of mechanical failures before the timer runs out.
The van's systems are divided into three primary categories: Problems, Useful Stuff, and the Vending Machine. "Problems" are the mechanical hurdles you must clear, such as dead batteries or flat tires. "Useful Stuff" includes the radar and surveillance monitors, which allow you to track teammates and predict weather patterns. Finally, the "Vending Machine" is where you spend Apex coins earned during runs to unlock powerful gadgets.
Common Van Failures and Requirements
Mastering Tools, Gadgets, and Consumables
To succeed in your mission, you need to understand the hierarchy of items. Not every item you find in a suburban garage is equally important. The game categorizes items into four distinct groups to help players prioritize their inventory space. According to player experience, managing your inventory is one of the steepest learning curves for newcomers.
Tools are the highest priority because they are mandatory for the win condition. Gadgets provide utility, such as the Crowbar for opening locked doors or the Umbrella for protecting against acid rain. Consumables offer temporary buffs, and Collectables are largely for lore and side objectives.
Item Categorization Table
The Moodlets System: Monitoring Your Status
In Funnel Runners, your character’s physical state is communicated through "Moodlets." These icons appear on your screen to indicate temporary or permanent status effects. Understanding these is a vital part of any Funnel Runners beginner guide, as ignoring a negative moodlet can lead to a swift death.
Moodlets come in two varieties: Temporary (which have a countdown timer) and Timeless (which persist until you take a specific action to resolve them). For example, the "Drenched" status will slow you down and make you more susceptible to electrical damage until you find cover and dry off.
Player Status Moodlets (Debuffs and Buffs)
Biomes and Environmental Hazards
Currently, players spend most of their time in the American Suburbs, a biome characterized by traditional homes, gas stations, and parks. However, the developers have teased a future "Old West" biome featuring desert landscapes and deadly tumbleweeds. Regardless of the biome, the environment is filled with hazards that are often consequences of the storm itself.
Fallen power lines are a major threat; when the wind knocks them down, they create electrical zones that can kill an unsuspecting player. Lightning strikes can also ignite fires, which can spread between teammates if they huddle too closely together. Community reports suggest that "destruction itself" is the most common silent killer—standing inside a house that is currently being demolished by a tornado will result in instant death.
Environmental Hazard Survival Tips
- Avoid Parks: Parks often have limited exits and very little substantial cover, making them death traps during high-wind events.
- Use Bathrooms: If you are caught in a house during a storm, the bathroom is often the safest "hard" cover available.
- Watch the Lines: Always look at the ground after a major wind gust to ensure you aren't walking into a live power wire.
- The Van is a Fortress: As long as the van doors are closed, the vehicle is considered a safe zone, even if the tornado passes directly over it.
Progression and Leveling Up
As you complete runs and fulfill secondary objectives, you will earn Apex coins and experience points. Leveling up is essential because it unlocks higher-tier gadgets in the van's vending machine. These gadgets make higher-difficulty runs significantly more manageable. For more information on the game's development and future updates, you can check the official Steam page for the latest patch notes.
Gadget Unlock Requirements
Step-by-Step Beginner Strategy
If you are feeling overwhelmed by the chaos, follow this simple phase-based strategy to get through your first few matches.
Phase 1: The Diagnosis
The moment the match begins, someone should sit in the driver's seat and insert the key. This action populates the "Problems" list, telling the team exactly what parts are needed (e.g., oil, coolant, or a new battery). Check the mission board for secondary objectives, but do not prioritize them yet.
Phase 2: Efficient Looting
Head to the nearest garages and gas stations. These locations are the most consistent spawns for fuel, oil, and tires. If you find a crowbar, keep it—higher difficulty modes may require you to break into locked houses to find the last remaining fuses. Remember to consume food and drinks immediately to save inventory space while keeping your buffs active.
Phase 3: Reading the Storm
Listen to the audio cues. An increase in wind volume means a tornado is making contact nearby. If the screen begins to shake or you feel your character being "tugged," immediately drop into a Solid Stance (crouch). This makes you much heavier and harder for the wind to lift.
Phase 4: The Final Repair
When you have the necessary tools and parts, return to the van. Repairing components often involves a fast-reaction mini-game. If you fail, you may damage the part or waste time. Once all mission-critical (blue) tasks are finished, everyone must get inside the van and select "Leave" to successfully end the run.
Funnel Runners Beginner Guide FAQ
Can I play Funnel Runners solo?
Yes, you can play solo, and the game will automatically adjust the balance by reducing the number of van problems you need to fix. However, the map size remains the same, meaning you will have to cover more ground on your own, which can be difficult within the 20-minute time limit.
What should I do if a teammate dies?
If a teammate is downed, their location will appear as a red dot on the van’s radar and surveillance monitors. You can revive them using a Defibrillator, which is unlocked at Level 30. Until you unlock that gadget, a downed teammate is usually out for the remainder of the run.
Why am I moving so slowly?
Movement speed is affected by several "Moodlets." Check your screen for the "Injured," "Very Injured," or "Heavy Load" icons. If you are carrying a heavy object like a tire or a battery, you will move much slower. Using an Energy Drink can provide an "Energy Frenzy" buff to temporarily counteract these penalties.
How do I find mission-critical items quickly?
In this Funnel Runners beginner guide, we recommend focusing on "Blue" tasks first. Mission-critical items are highlighted in blue on your radar, while general loot appears in green. As you reach Level 50 and unlock the Pocket Radar, identifying these items through walls becomes much easier.
Related Guides
Essential Funnel Runners Tips: How to Survive the Tornado Onslaught
Master the storm with our ultimate Funnel Runners tips. Learn how to repair your van, coordinate with friends, and escape natural disasters.
Master the Storm: A Comprehensive Guide to Funnel Runners Gameplay and Survival Strategies
Learn how to survive the F5 tornado with our in-depth Funnel Runners gameplay guide. Discover scavenging tips, van repair steps, and co-op tactics.
The Ultimate Funnel Runners Guide: How to Survive the Storm and Escape
Master the storm with our ultimate Funnel Runners guide. Learn van repair strategies, hazard management, item locations, and multiplayer tips.